ddrescue clone failing hard drive

  • Clone hard drive with ddrescue

    Testing a hard drive for failure via smartmontools

    Install smartmontools if not already present: (debian)

    apt-get install smartmontools

    Locate specific hard drives currently installed:

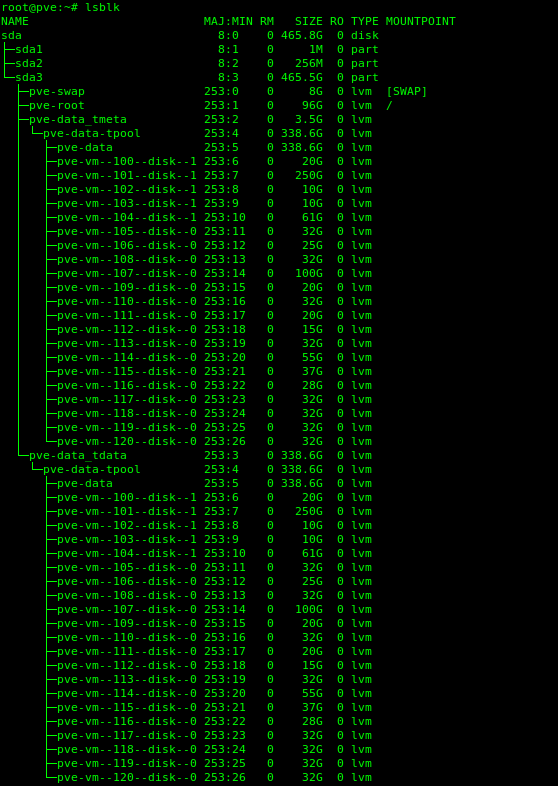
    lsblk


    In this case I choose device ‘sda’

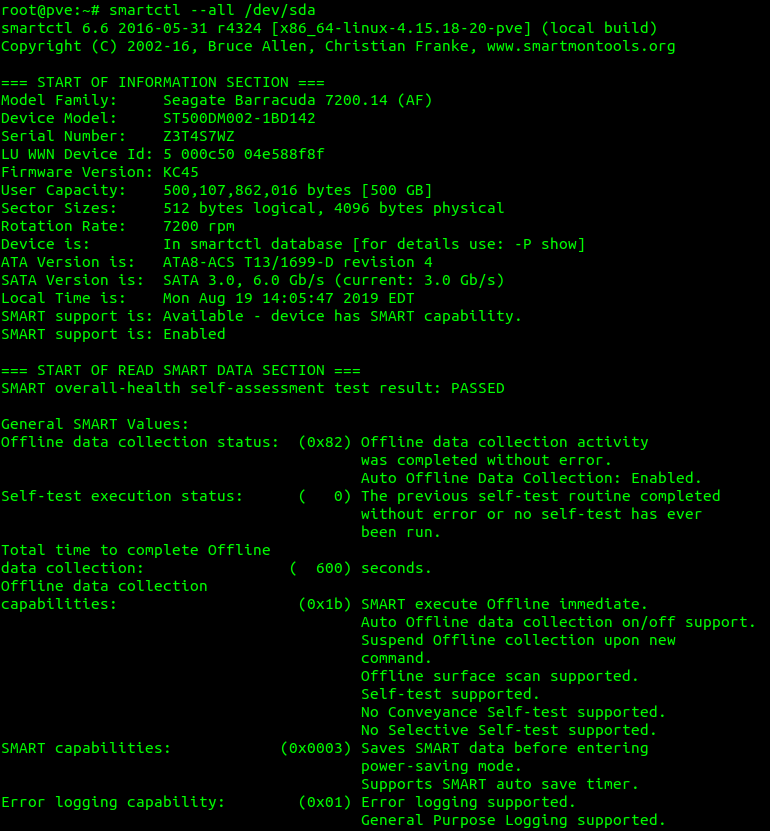
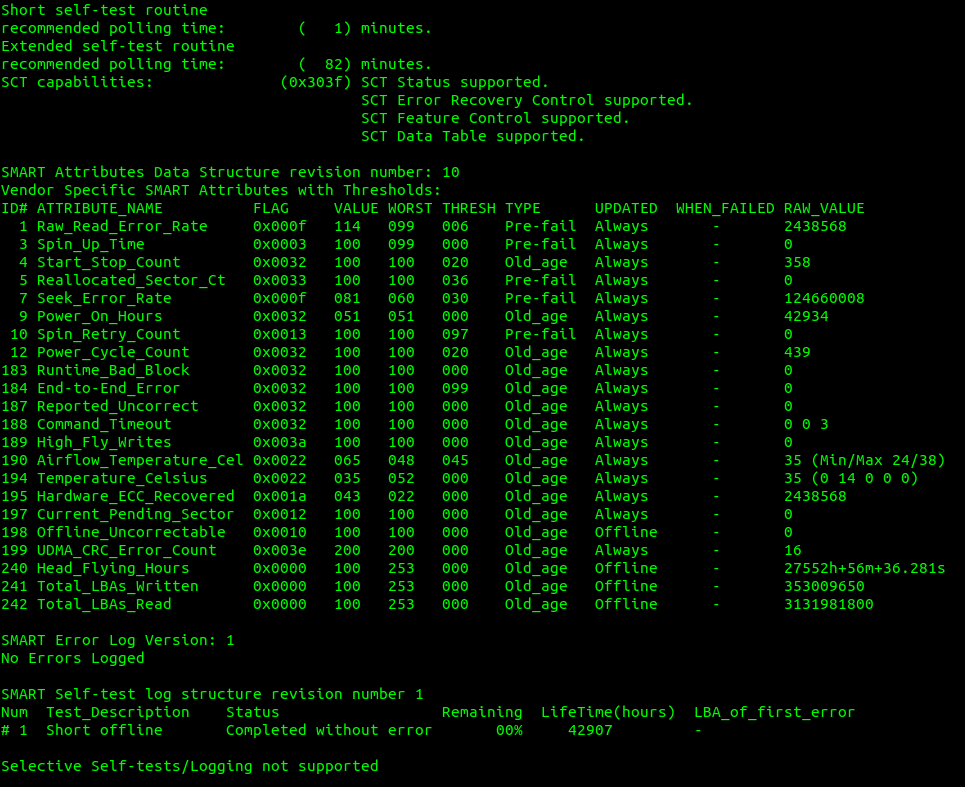
    smartctl --all /dev/sda -q errorsonly

    Example of failing hard drive: smart-failure.png


    Preparing a used hard drive for cloning

    Clearing existing partitions from destination hard drive:

    In this case the destination drive is defined as sdc:

    I’ll use fdisk to clear all existing partitions:

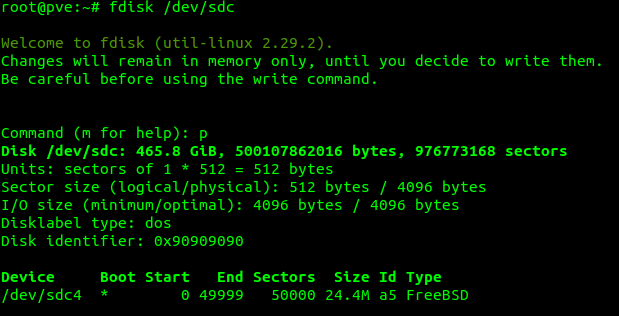
    fdisk /dev/sdc Then print partition existing on sdc by typing the letter p

    p

    fdisk.png

    The above image shows some detail on the destination drive, including on FreeBSD partition named /dev/sdc4

    Since there is only one partition on the destination drive, we simply need to type the letter d at the fdisk command prompt:

    d

    fdisk-delete.png

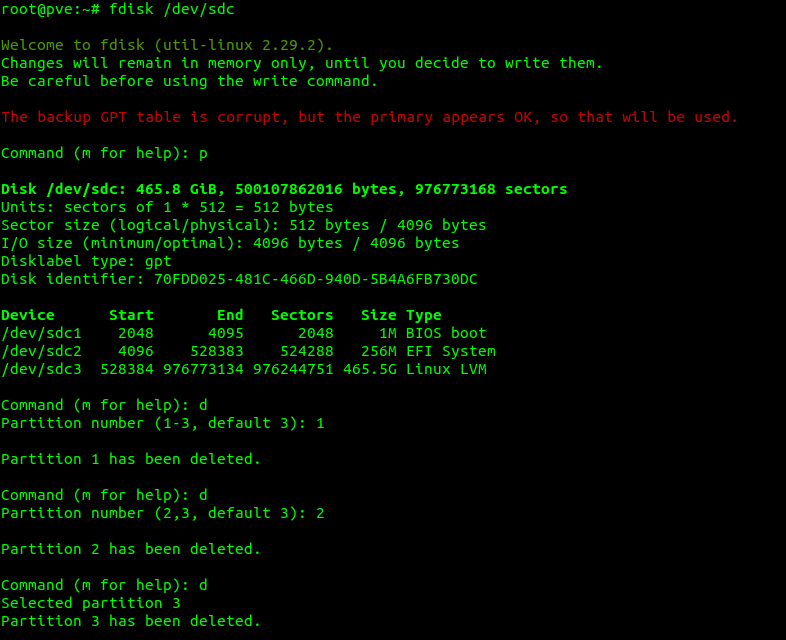
    If there are more existing partitions on the destination drive, we are presented with them, and numbers to go along, we select which partition via numbers what we delete (in this case everything)

    fdisk-multiple-partitions.png

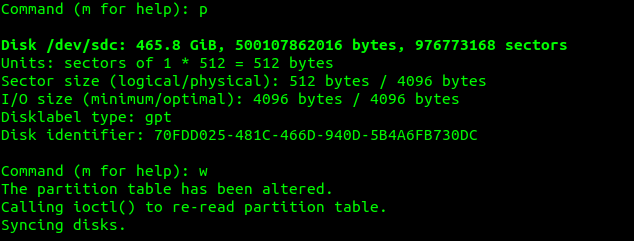
    Once we’ve removed the partitions, we type the letter w to write the changes, (actually delete the partitions)

    I type the letter p once again to make sure no partitions are still on the disk and then the letter w to write the changes:

    fdisk-write.png


    Using ddrescue to clone the hard drive:

    !Insure your drive letters are correct!

    The command I use to simplify the procedure including reading the damaged drive and putting as little pressure on it as we can manage, while getting as much data as we can, are as follows:

    Insure existing, or damaged hard drive first, and destination hard drive second (In other terms input file first and output file second)

    ddrescue -f -n /dev/sda /dev/sdc /root/recovery.log

    From https://linux.die.net/man/1/ddrescue

    -f, --force overwrite output device or partition

    -n, --no-split do not try to split or retry failed blocks

    We set a log file, which ddrescue can read later if for any reason the proceedure fails in the middle. Or also if we do not get as close to a 100% success rate when finished, the log file will set ddrescue to only attempt to get failed blocks on additional runs.

    ddrescue.png

    In this case 100% of the data was recovered, and transferred to the new hard drive:

    ddrescue-complete.png

    I run lsblk once again to check partitions have been transferred: ddrescue-new-partitions.png


    I then restart the machine:

    shutdown -r now

    After a restart, the journal will be recovered as well as other routine scripts run. I remove other old, damaged hard drives during the restart just before the BIOS kicks up.

    Again after a restart I run :

    lsblk

    ddrescue-new-harddrive.png

    Fin!


    Note This local server is a test environment running ProxMox. Everything running as it should after the clone.

  • Again running smartctl after all is said and done:

    smartctl --all /dev/sda

    ddrescue-smartctl-after-rescue.png ddrescue-smartctl-2.png

    Yet an old drive in itself, I run the wheels off of them, and monitor regularly as anyone should.

  • rickR

    Re: Set script to executable

    755 - Owner has all permissions, and Group and Other can read and execute 700 - Owner has all permissions 644 - Owner can read and write, and Group and Other can read 600 - Owner can read and write 775 - Owner can read and write, and Group and Other can read 770 - Owner and Group have all, and Other can read and execute 750 - Owner has all permissions, and Group can read and execute 664 - Owner and Group can read and write, and Other can just read 660 - Owner and Group can read and write 640 - Owner can read and write, and Group can read
    read more

  • rickR

    Re: Find or Locate a file or extension command line

    Install locate command linux: Use your sudo command!

    apt install mlocate

    OR:

    apt-get install mlocate

    OR:

    yum install mlocate

    Update the database:

    updatedb

    Depending on the size of the complete filesystem this could take a few minutes

    After the database has been populated:

    locate mariadb

    Where mariadb is the word your looking for

    read more

  • rickR

    These commands are if you are in the scripts directory! Changing permissions can be done from anywhere in the structure.

    Such as :

    chmod +x /opt/so-elastic-agent_linux_amd64

    Terminal chmod to executable :

    Permissions prior to chmod : chmod.png

    chmod +x so-elastic-agent_linux_amd64

    Permissions following chmod : chmod-x.png

    Then execute :

    ./so-elastic-agent_linux_amd64

    Insure you are acting as the user you just gave permissions to (the file owner) or at least have sudo privileges

    To make the script un-executable:

    chmod -x so-elastic-agent_linux_amd64
    read more

  • rickR
    sudo apt install lsb-release ca-certificates curl -y

    GPG key and repo for php 7.4

    sudo curl -sSLo /usr/share/keyrings/deb.sury.org-php.gpg https://packages.sury.org/php/apt.gpg sudo sh -c 'echo "deb [signed-by=/usr/share/keyrings/deb.sury.org-php.gpg] https://packages.sury.org/php/ $(lsb_release -sc) main" > /etc/apt/sources.list.d/php.list'

    Update the system with the new repository in place

    sudo apt update

    Install the dependencies for OwnCloud (LAMP ect) Certbot, or LetsEncrypt is being installed as well, if you are using this installation in a public domain

    sudo apt install apache2 mariadb-server imagemagick certbot python3-certbot-apache smbclient redis-server unzip rsync libapache2-mod-php7.4 php7.4 php7.4-intl php7.4-mysql php7.4-mbstring php7.4-imagick php7.4-igbinary php7.4-gmp php7.4-bcmath php7.4-curl php7.4-gd php7.4-zip php7.4-imap php7.4-ldap php7.4-bz2 php7.4-ssh2 php7.4-common php7.4-json php7.4-xml php7.4-dev php7.4-apcu php7.4-redis libsmbclient-dev php-pear php-phpseclib

    Enable apache2 and then verify it’s status

    sudo systemctl is-enabled apache2 sudo systemctl status apache2

    oc-apache.png Enable MariaDB and verify status

    sudo systemctl is-enabled mariadb sudo systemctl status mariadb

    oc-maria.png Enable Redis and verify status

    sudo systemctl is-enabled redis sudo systemctl status redis

    oc-redis.png

    Configure default php version

    sudo update-alternatives --config php

    oc-php-alternatives.png oc-php-ver.png

    Configure php OwnCloud dependencies

    sudo update-alternatives --set phar /usr/bin/phar7.4 sudo update-alternatives --set phar.phar /usr/bin/phar.phar7.4 sudo update-alternatives --set phpize /usr/bin/phpize7.4 sudo update-alternatives --set php-config /usr/bin/php-config7.4

    Upgrade Pear to OwnCloud4 requirements

    sudo mkdir -p /tmp/pear/cache sudo pear upgrade --force --alldeps http://pear.php.net/get/PEAR-1.10.13

    oc-pear-up.png

    sudo pear clear-cache sudo pear update-channels sudo pear upgrade --force sudo pear upgrade-all

    Verify Pear version

    pear version

    oc-pear-ver.png

    Configure MariaDB

    sudo mariadb-secure-installation

    oc-mariadb-setup.png

    Log into MariaDB

    sudo mariadb -u root -p

    Create the OwnCloud database:

    This is where many go wrong, we do not use ‘password’ we replace password, with our own password.

    CREATE DATABASE owncloud;

    We just created a database with the name owncloud

    CREATE USER IF NOT EXISTS 'owncloud'@'localhost' IDENTIFIED BY 'password';

    We just created a database user called owncloud

    GRANT ALL PRIVILEGES ON owncloud.* TO 'owncloud'@'localhost' WITH GRANT OPTION;

    We just allowed user owncloud, full privileges on database owncloud

    FLUSH PRIVILEGES;

    Now verify what we have just done:

    SHOW GRANTS FOR 'owncloud'@'localhost';

    You can see below I named this database ‘oc’ and the ‘oc’ user has privileges on database ‘owncloud’

    oc-db-priv.png

    quit;

    wget the OwnCloud source

    cd /var/www wget https://download.owncloud.com/server/stable/owncloud-complete-latest.tar.bz2

    Grab sha256 to verify the download

    wget https://download.owncloud.com/server/stable/owncloud-complete-latest.tar.bz2.sha256

    BEFORE installing, verify if the download of OwnCloud matches what the OwnCloud team wanted you to have, this is important always.

    sudo sha256sum -c owncloud-complete-latest.tar.bz2.sha256 < owncloud-complete-latest.tar.bz2

    Out put should say ‘OK’ if everything matches.

    Change ownership of the directory to www-data user.

    sudo chown -R www-data:www-data /var/www/owncloud

    Configure Vhost for OwnCloud

    This will open a new file in 'sites-available and name this file ‘owncloud.conf’

    Change the ServerName and ServerAlias, as well as log file names, to whatever your domain is. There are many ways to do this keep in mind.

    sudo nano /etc/apache2/sites-available/owncloud.conf <VirtualHost *:80> ServerName oc ServerAlias www.oc DocumentRoot /var/www/owncloud ErrorLog ${APACHE_LOG_DIR}/oc.io-error.log CustomLog ${APACHE_LOG_DIR}/oc.io-access.log combined Alias /owncloud "/var/www/owncloud/" <Directory /var/www/owncloud/> Options +FollowSymlinks AllowOverride All <IfModule mod_dav.c> Dav off </IfModule> SetEnv HOME /var/www/owncloud SetEnv HTTP_HOME /var/www/owncloud </Directory> </VirtualHost>

    Enable and verify the owncloud vhost

    sudo a2ensite owncloud.conf sudo apachectl configtest

    oc-apache.png

    Now install OwnCloud

    Change the database name, user, and password to whatever you named the OwnCloud database earlier;

    Change the ‘admin user’ and ‘admin pass’ to whatever you want the new OwnCloud admin account to be.

    sudo -u www-data /var/www/owncloud/occ maintenance:install \ --database "mysql" \ --database-name "owncloud" \ --database-user "owncloud"\ --database-pass "password" \ --admin-user "admin" \ --admin-pass "your new owncloud admin password"

    Edit the OwnCloud config file to add the domain you used earlier in the Apache2 vhost file:

    sudo nano /var/www/owncloud/config/config.php 'trusted_domains' => array ( 0 => 'localhost', 1 => 'whatever your domain is goes here', ),

    Personally I restart the server at this point, which will restart all services. Then visit the domain / IP of your settings and you should see the OwnCloud login page. Use the credentials you setup for the admin user.

    System cron setting:

    sudo crontab -u www-data -e */15 * * * * /usr/bin/php -f /var/www/owncloud/occ system:cron

    Memcache with Redis we installed earlier:

    sudo nano /var/www/owncloud/config/config.php 'filelocking.enabled' => true, 'memcache.local' => '\OC\Memcache\APCu', 'memcache.locking' => '\OC\Memcache\Redis', 'redis' => [ 'host' => 'localhost', 'port' => 6379, ],

    Go restart the server again and enjoy!

    read more

  • rickR

    Comment out in=>

    /usr/lib/python3/dist-packages/middlewared/plugins/vm/vms.py # elif flags['intel_vmx']: # if vcpus > 1 and flags['unrestricted_guest'] is False: # verrors.add(f'{schema_name}.vcpus', 'Only one Virtual CPU is allowed in this system.') # elif flags['amd_rvi']: # if vcpus > 1 and flags['amd_asids'] is False: # verrors.add( # f'{schema_name}.vcpus', 'Only one virtual CPU is allowed in this system.' # )

    At this point we must comment out each time we update the system.

    read more